Showing posts with label Valentines Day. Show all posts

Friday, February 15, 2013

Valentines Day Final Wrap Up


Agent Smelly made some key rings from Hama beads for her swap. There's an extra one there for a cousin.


We made a pile of these little packs up that read "I'm bananas for you!" and put some lolly bananas in them then gave them out to people randomly. We could here one shop girl yelling out to the other workers to come see what she had just been given by these two cute little girls for Valentines Day. She was seriously thrilled which was lovely. The girls and I were laughing so hard as we could hear even outside the doors!


Agent Smelly made some lovely red velvet cup cakes for dessert and The Fashionista iced them. What a team! I asked them to take a photo ... I did mean once they had removed them from the muffin tray though ... the dags!


We don't usually do anything for Valentines Day but the girls had a lot of fun making things for other people this year and we will be sure to do something again next year.

Monday, February 11, 2013

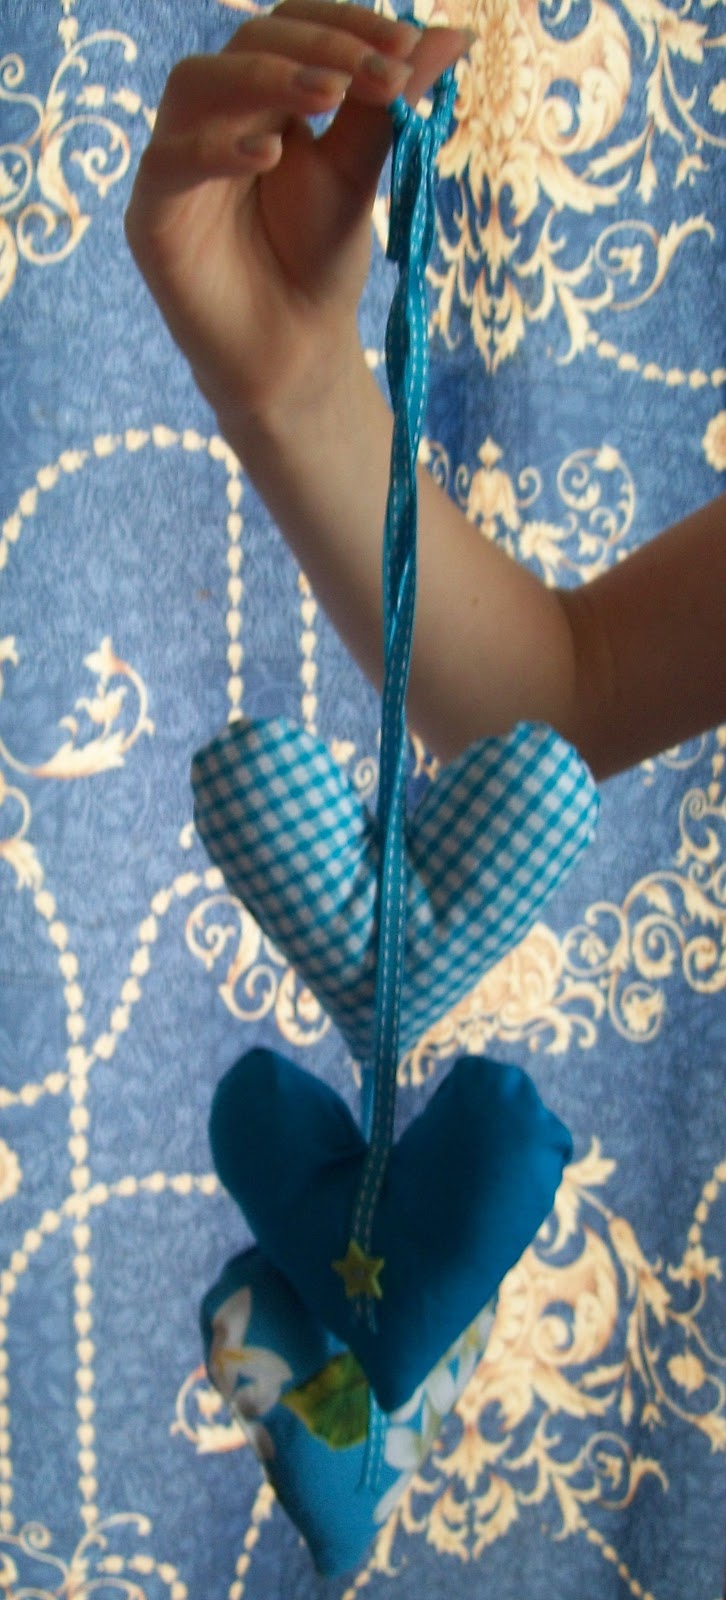
Valentines Hearts

The Fashionista decided to make these hanging hearts for her Valentines Day Swap.


They took her AGES, I was groaning by the time she finished them and almost offered to help but I didn't want to interfere ... not that she would have let me anyway, she's very independent. She did a really good job and didn't cut any corners, in fact she tends to add more when she makes things, if she feels they need a little something, hence the buttons on the plain hearts.

I want to know where my set is! She's making a set for her sister too, in yellow, her favourite colour.


The day she started making them she was wearing a t-shirt that had a balloon floating towards a cactus that is surrounded by hearts. Underneath it reads, "Impossible Love" ... she has a corny sense of humour, like her Mama.


Sunday, February 10, 2013

Felt Valentine Bookmarks

Agent Smelly made these lovely felt bookmarks as part of our Valentines Day Craft Exchange. We saw similar on Pinterest and went away and had a go at working out how to make them.


She is 8 and made them by herself with just a couple of words of advice from me here and there. She is totally proud of herself and deservedly so I think. They took around 45 minutes each.


Instructions to make Felt Heart Bookmarks.


1/ First cut out 2 large and 2 small felt hearts


2/ Take some embroidery thread and a piece of ribbon (enough to go through the middle of a regular sized book) and start sewing around one heart, including the ribbon as you go around.


3/ Sew the button on. If you start sewing in the right place you can just add the button on when you finish sewing around, all in one go. Then do the same at the other end of the ribbon with the smaller heart. Make sure you have both hearts facing the same way; yes, yes she did! Thankfully she realised it before she had gotten too far around.


4/ Place fabric glue on the back of the hearts and then press the other hearts on in order to cover up the back of the sewn hearts.


5/ And there you have it. A simple but sweet bookmark. You could make these in so many different shapes and colours.


Highhill Homeschool

Friday, February 8, 2013

Valentines Gift Bags

Agent Smelly has made these sweet little packages, from simply postage envelopes, for her Valentines gifts to go into.


Instructions to make Envelope Gift Bags


Step 1.  Seal the envelope.


Step 2. Stamp both sides of the envelope with different stamps and colours of your choosing.


Step 3. Slice about a cm (half an inch) off one of the thin ends of the envelope. This will be the opening.


Step 4. Score the envelope on the remaining 3 sides. How far you score, will depend on how wide you want your bag to be. We found they sit better if they are wider on the side so we scored about 2 cm's (bit less than an inch) in from the edge of the three uncut sides of the envelope. You will need to do it on both sides or it will not bend properly when you try and make the bottom and sides open out.


Step 5. Place your hand inside the envelope and pinch the sides out on each side of the bottom to get a flat bum (oh don't I wish!). You will end up with two little triangles sticking out on the side.


Step 6. Pinch the sides, right along your scores pushing the bit in the middle inwards. Then fold those triangle ends up and glue or double sticky them in place against the sides.


Step 7. Cut a wee oblong of card / paper that is as wide as the bag is when it is folded (ie the bit inside the scored area). Then fold it in half and glue it to one side of the bag.


Step 8. Put some ribbon on it and voila. You can staple or use some double sided tape under the open side of the lid, to close it off once you have put your items inside it.


Remember these were made by an eight year old, so are pretty simple to make but are so darn cute, don't you think. If you need any clarification of the above instructions please drop me a line in the comments section.


Highhill Homeschool

Sunday, February 3, 2013

Valentines Day Craft Swap

Yesterday I came up with the idea of organising a craft exchange for Valentines Day. I emailed a few, mostly homeschooling, families. Some have signed on but due to the time constraints a few declined saying that would love to do one with us again some other time but they were ALL very enthusiastic about the idea.


The idea is for groups of girls (up to 5 in a group) aged between 7 and 12, to make and exchange a Valentines gift with each girl in their group. If we had enough girls I would have split the groups into age groups of 7-9 and 10-12 but we didn't this time around so they are a bit mixed up. A friend suggested also having a 5- 6 year old group exchange handmade cards. which could have been great if we had of had more time to get the info out there. I did say that boys could be involved but they must be prepared that they could possibly receive a lot of pink, red and hearts.

Each participant is asked to make five gifts, 4 for their group participants with the last one being popped in a letterbox, or handed to someone at a store counter, club, etc. I thought this would be a good lesson for the child in giving something, without expecting or ever receiving anything in return. With this anonymous gift a little note should accompany it, saying something along the lines of "Although you don't know me and I don't know, know that this 8 (9, 10, etc) year old wishes you a very Happy Valentines Day. This is a Random Act of Kindness - Spread the joy!" Something like that so that the person knows that this is an Act of Random Kindness by a child. The reason for the note is that I didn't want any hubbies or wives wondering why their partner was receiving things in the post for Valentines Day from some anonymous person ... we want to bring joy not cause an argument ... can you imagine. I can also imagine the smile brought to a face by receiving an anonymous Valentine from a child.

We requested that the items be of a reasonable quality as I think it would be disappointing if one little girl sewed up, say a pile of felt hearts and then received something slapped together in a few minutes made from paper and glue.

All the girls that have signed on are anxious to get moving, so I can't wait to see what little treasures they all come up with.

I have been toying with the idea of organising a kids Christmas Ornament swap amongst the homeschooling community of NZ, so this will be a great way for me to iron out any ruffles before trying that, which will be on a much larger scale.

Pin It