Showing posts with label Arts and Crafts. Show all posts

Tuesday, December 30, 2014

Handmade Christmas Gifts

We have a $5 limit on gifts that the girls purchase or preferably make for us and each other for Christmas. There is so much pressure on people at Christmas to give these fantastic gifts that are often expensive (cause let's face it, what isn't expensive!) and we don't want them getting caught up in that. We are trying to instil in them that it is not about how much something costs but the thought and effort that goes into the gift.


Bearing that in mind, Agent Smelly made a cushion for her sister's bed in her favourite colours with the words DANCE across it ... I think she did a great job!  It also didn't cost her anything, except time and effort as she purloined everything from my craft cupboard ... haha


The Fashionista made Agent Smelly a wee purse which looks very funky.  Same amount spent by TF, i.e. Mama's craft cupboard! 


The girls needed some sunnies so at the last minute I grabbed a couple of cheap pairs ($4 from a local cheap store) and made little sunglass covers for them. They came out so well, even the Papa was impressed, and I have now made myself one for my sunnies. Also in true parenting style, I made them Christmas Eve ... nothing like leaving things to the last minute is there.

The girls both made me some pretty awesome decorations for my tree. Sadly in my haste to clean up post Christmas I packed them away without photographing them ... mummy fail!


Do you make gifts in your own home? My ambition in 2015 is to make more gifts for the people I care about.

Sunday, November 23, 2014

Candle Design

Miss 12 and I designed and decorated these candles today as gifts for her ballet and contemporary dance teachers.

Her ballet teacher's candle reads, "Life without Ballet would be pointeless". We were going to make it in pink and black but as her teacher is an older lady we thought red more appropriate.

Her contemporary teacher is a lot younger, and so we made it a little more modern. It reads "A dance teacher helps their students find the song in their heart (pic) the beat in their feet and a passion for life".

On the back of the candles, in small writing towards the bottom, like on the back of greeting cards are the words, "Thank you, her name and 2014". She is really thrilled with the result and hopes her teachers like them.


Side note:  Teachers were thrilled with their gifts and even showed them to other teachers who were quite envious. We had to explain over and over again how we made them ... lol

Monday, July 7, 2014

Watercolouring Book Pages

I was cleaning the school room up recently and found an old book that I had gotten from the library purposely to make a wreath with. Being me I hadn't gotten around to making the wreath but I had the sudden idea to do the following.

 
First of all I drew a quick picture with a black marker on one of the pages. I know it sounds horrible to be drawing in books but the pages were already falling out which is why I picked that book at the library.


Then I coloured the picture "partially" in with some watercolour pencils.


Then I popped some water gently over the coloured bits and voila! You could easily use water coloured paints, this was just easier for me to grab and use.


The kids were watching what I was doing and before long they were right into churning out lots and lots more pictures ...


As you can see from these two pictures above, don't always colour the whole picture. They look great with some of the text showing through.


Sadly the photos don't do justice to how awesome and effective these look in person but everyone who enters the school room comments on how great they look. So if you are looking for something easy and quick for the kids (and the mama's) to do then I'd recommend trying this for some fun. I may even frame a few of my favourites down the track.


Friday, July 4, 2014

My Command Centre takes Off

I have been after a command centre for ages. I just love them and am hoping it will make me that little bit more organised ... dreams are free my friends!

For those that haven't seen them on Pinterest (that will be you my friend, Sue Elvis, but we will bring you around!)  here are a couple of examples ...


I decided to combine a couple of my loves in order to start my project, ie repurposing something old (I know how it is to start to being a bit older and feeling a bit useless hence my repurposing everything that I can!) and getting something snazzy for a real bargain.


Anyone remember these old spice racks? Well I picked this one up from the place I volunteer at for the princley sum of $2. People who know me will not be surprised that I always come home from there with some "find". I can't help myself.


Here she is again all snazzified with some black gloss test paint that I found in the garage. I wasn't going to go black but it seems to hide a multitude of sins (she was a bit yukkier in real life than the photo actually looks) and also will give a modern feel to my study, which should help with the house sale in due course, where the command centre will probably end up. I am not entirely sure what will go in it yet possibly some mail, invoices, receipts or such.

So that is my first piece for my command centre ... piece two is already on it's way peeps! Stay tuned.

Wednesday, April 23, 2014

Easter Craft Exchange

The girls were involved in another craft exchange this one was Easter themed.


They both chose to sew their crafts.


The Fashionista made some stuffed rabbits. Agent Smelly thought she'd be funny making rabbit ears behind her sister ... there's one in every family!


Here's AS with her stuffed felt Easter eggs.  Hope the families have Easter trees ... lol


These are "Bunny Tails" that the girls and I put together to go in with all the packs we sent out.


These are the Easter cards we three gals made.


And lastly here are some of the Easter crafts we received in exchange. There are more than 6 because unbeknownst to three boys I entered their group to make up a fourth and made rabbits similar to TF's but in black material with gold starts and big gold bows and I forgot to take photos of mine. Silly me!

Wednesday, March 5, 2014

Drawing Success

Agent Smelly eats, breathes and lives mermaids. So today for art I pulled up this You Tube tutorial How to Draw a Mermaid and set the girls to work. They absolutely LOVED doing this.


First they were taken through the step by step drawing in pencil.


Then they used markers to outline the final picture


Then they got to colour them in.
 
 
They enjoyed this so much so that they ended up doing another one on drawing a cartoon whale.


The Fashionista was happy with her pictures but it was pretty amazing to hear Agent Smelly so excited over hers. She usually complains that she can't draw. She told me when showing me her pictures, "Mama I am so proud of myself". Obviously a pretty awesome homeschooling moment.


Monday, February 10, 2014

Aboriginal Art

As we are hoping to head over to Aussie for a month, I have kind of been mixing things up a bit with our Australian studies. I would like to visit a few places so have brought some subjects forward a bit so that when visit some places on my list, they will understand it better and the excursions will give it more meaning.

So this week we jumped ahead to doing some work on the Australian Aboriginals. We read a couple of books, had a discussion on the Aboriginal people and culture. We did not get into it to deeply as we will save that for later when we have more time and then we followed that up with them looking at some aboriginal art online and then doing some by themselves.


I left them too and came back in a wee while later and this is when the mummy fail moment happened. I told Agent Smelly how awesome the whale she was working on was looking (Bottom right corner) ... she pointed out that it was a lizard. Oh dear! You would think I would know better! I did love her fireworks at the top.


The Fashionista has drawn a snake with some patterns. They really enjoyed making these and are keen to do them again.


Then Agent Smelly came out like this ... they decided to start painting themselves for a Corroborree. I do love it when they do crazy stuff like this because they have been inspired by something we have read or done!
 

Monday, December 2, 2013

First Christmas Ornament Exchange

Because I am a glutton for punishment, this year I organised a Christmas card or ornament exchange for New Zealand home educated children.
 
For those aged 5-7 they could make and exchange their own cards and for those 8 and above they could participate in an ornament or craft exchange. We had about 70 children enrolled and they were sorted into groups of four, by their ages.
 
My girls made the following ornaments for their exchange partners.


Agent Smelly, simply used a large cookie cutter to trace Christmas trees onto white felt and then sewed mistmatched buttons onto them and stuffed them and sewed them up with blanket stitch. Sorry my photo doesn't do them justice, they are really cute!


The Fashionista made these ornaments out of felt (she used a red button for the holly) and also stuffed and blanket stitched them. She traced around a large sticky tape roll to get the size of the plum puddings and then free hand drew and cut out the holly leaves. They came out awesome!


They also included a pack of the Reindeer Noses, pictured above, for each of the children in the exchange. There are loads of reindeer labels on Pinterest but we printed these Reindeer Noses labels from Over the Big Moon who has kindly supplied a free printable (four labels to an A4 page). We packed a zip lock bag with a Jaffa (Rudloph's nose) and eight Maltesers for the other reindeers.
 
I was a great help ... I finished off the pack of Maltesers ... mmmmm Maltesers.

Friday, November 29, 2013

Easy Pom Pom Christmas Ornaments

We made these very easy Christmas ornaments, that I saw on Pinterest, recently.


On the instructions it said to take dressmaking pins and push them through the little pom poms and then push them into the white Styrofoam balls. As we didn't have any little pins without those big plastic heads and I hadn't bothered actually reading the instructions ... cause I fly like that ... we ended up simply hot gluing the pom poms on. They worked out quite well, although if you have little fingers making them, the pins are probably safer than a hot glue gun or an adults help will be needed.
 
We did push a pin through the ribbon to hang the balls, but also hot glued the pins and ribbon onto the ball. I have used pins before to hang Styrofoam ornaments and they have come out after a while so I wanted to make sure these stayed together.


Some tips:
  • Don't get big Styrofoam balls as firstly they will take a LOAD of pom poms and secondly they will end up huge once put together. These balls in the above pic are a bit bigger than a golf ball and about the size of a tennis ball when complete.
  • Get a "lot" of pom poms ... those four ornaments above took 1 pack of small pom poms and 1 pack of large pom poms.
  • Purchase the larger pom poms, those mini ones are simply too small and it will take too long. The larger ones look better too, they seem to cover the gaps better.


Wednesday, November 6, 2013

Crayon Art

We are in the process of FINALLY arranging to have Agent Smelly's bedroom painted. She is having her walls painted yellow, with white trim and we have had drapes made up that are white with blue and yellow flowers. I am also looking for art and other accessories to add to her room too. It is not very easy to find girly things unless you are into pink or purple really so I have been making some things for her. I have seen a few art canvasses on Pinterest where you melt a crayon across a canvas, not difficult but there are a few variations and they look really cool.


So for our last art session Agent Smelly and I used a hair dryer to melt some crayons over 4 small canvasses which will go on her bedroom wall once it is complete. The photo does not actually do it justice and you can't see the different texture like you can in person.


Some tips if you are going to try it.
- We used some metal tongs to hold the crayon so the hair dryer didn't burn our fingers.
- It was not as easy as it looked as sometimes the melted crayon went flying across the bench, canvass or yourself. There's not a lot of control really.
- We also had some of those really thick large crayons left over from when the girls were young, don't use them if you have them, they are really hard to melt.
- We also tried grating some crayon and gently blowing on it but even gently blowing the crayon goes flying everywhere.


Wednesday, October 30, 2013

Finishing UFOs


During art this week, The Fashionista went to work on completing her very first hand sewn teddy bear. There's a bit of work still to go but she has finished attaching, stuffing and sewing up the legs. The arms are also attached and there is now only the head to go. I have been helping with the pins used to secure the limbs as they are a little hard to twist. When I first started hand sewing bears I used to get the Papa to twist the pins for me.


Agent Smelly chose to sew a bow onto one of her teddy's ears (that's teddy in the pic and you can just see a glimpse of the bow on her right ear which matches her dress) and then she sewed some Guiding patches that she recently earned onto her sash.

Both the girls said they are really enjoying our Fridays and I had to suggest they take a break a couple of times as they got so into what they were doing.

I confess I sat at the end of the table updating the blog rather than completing any of my own UFOs ... Naughty Mama.

Friday, October 25, 2013

Christmas Block Countdown

How onto are we ... it's October and we have already completed our first Christmas craft. OK because I am so honest I will confess we started these not last year but the year before and simply ran out of time to finish them. I packed them away and only found them over the school break. 


Now I have scheduled (yes I am a scheduler ... I tried going freestyle and it was awful but that's for a whole other blog post) Fridays as our creative day. We spend the day doing a shared reading, poetry, music, arts and crafts. Because we have a few UFOs (unfinished objects) laying about I have decided that these must be finished first before we tackle any further big art projects. This Mama is as bad as the kids and it's really not a good habit to get into, so I am endeavouring to either finish it or get rid of it for someone else to enjoy doing.  

Now for this project we ...


1. First up cut some wood. We cut two small cubes from a 4" x 4" and then a third piece that was just a little bit longer than the two small pieces of block.


They grow up so fast.
2. Sand the pieces so there are no rough sides.


3. We painted the blocks in an acrylic paint. We used some enamel house paint for the white and purchased a small tin of tester paint for the green and red. You could simply varnish them or even decoupage them if you wanted to.


4. The girls chose a Santa picture / clip art (The Fashionista wanted modern and Agent Smelly old fashioned) and I printed off their labels (a bit smaller than the side of the largest block) on the PC and then simply laminated them. You could use stencil, stickers, or even hand paint them. I hot glued their labels onto one side of their largest blocks.


5. They then painted the numbers onto the blocks. You could use a stencil (the girls used me to sketch them on for them), or even foam numbers or stickers.
      - One block needs to have the numbers 0, 1, 2, 3, 4, and 5
         and block two need to have 0, 1, 2, 6 (which also serves as 9), 7 and 8.


Sadly the girls are already using their blocks to count down the days to Christmas, which is causing me heart palpitations ... who knew Christmas was so close!!!!
Virtual Fridge Link Up

Monday, September 30, 2013

Harry Potter Quotes

As part of our Harry Potter study, we chose some quotes from the series and then we discussed them.

We then picked the quotes that we liked best (or in the case of a certain child, the one that didn't look too long to write!) and wrote them in Sharpie's onto some of our dinner plates and then low baked them so they'd set.


These are the quotes we have chosen thus far ...

- It is our choices, Harry that show us who we truly are, far more than our abilities.

- We've all got both light and dark inside us. What matters is the part we choose to act on. That's who we really are.

- We must all make the choice what is right and what is easy.

- what's comin' will come and we'll meet it when it does.

And these are some more that we are going to do ... some plates were int he dishwasher and I really couldn't be bothered handwashing them ...

- If you want to know what a man's like, take a good look at how he treats his inferiors, not his equals.

- It takes a great deal of bravery to stand up to our enemies, but just as much to stand up to our friends.

- Happiness can be found in the darkest of times, if one only remembers to turn on the light.

- It does not do to dwell on dreams and forget to live.


We are a bit chuffed with them ... cause we are quite nerdy that way.

Wednesday, August 7, 2013

Decorating Gumboots

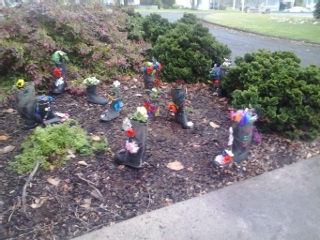
The girls were so very excited and proud of the "decorated" gumboots that they made at the Church School Holiday Program this term.
 
The Fashionista's boot, she had two little helpers.


Agent Smelly's Gumboot is on the left


The boots are all lined up outside the entrance to my mother-in-laws church. She was so chuffed when she saw them the following Sunday.
Pin It